How to Get a Shopify Access Token for API Integration
Creating a Shopify access token is essential for developers and store owners who want to integrate third-party applications, automate workflows, or build custom solutions on the Shopify platform. Whether you're developing a private app, building a public app for the Shopify App Store, or integrating with external services, understanding how to create and manage access tokens is crucial for secure API communication.
In 2026, Shopify's token generation process has become more streamlined, but security remains paramount. This comprehensive guide will walk you through every step of creating a Shopify access token, from initial setup to implementation and troubleshooting.
What You Need
- A Shopify store (development or production store)
- Admin access to your Shopify store
- Access to the Shopify Admin dashboard
- Basic understanding of APIs and authentication
- A code editor or IDE for implementation
- Curl or Postman installed (for testing API calls)
- Knowledge of your app's required API scopes
Required API Scopes
API scopes define what your access token can access on the Shopify store. Before generating a token, determine which scopes your integration requires. Requesting only necessary scopes follows the principle of least privilege and enhances security.
| Scope | What It Allows |
|---|---|
| read_products | View product information, including titles, descriptions, images, and pricing |
| write_products | Create, modify, and delete products in your store |
| read_orders | Access order details, customer information, and order history |
| write_orders | Create and modify orders, manage fulfillments, and update order metadata |
| read_customers | View customer profiles, email addresses, and contact information |
Step-by-Step Guide
Step 1: Access the Shopify Admin Dashboard
Log in to your Shopify store's admin dashboard using your credentials. Navigate to the URL format: https://admin.shopify.com/admin or access it directly through your store's admin panel. Ensure you have admin-level permissions to create and manage access tokens.
Step 2: Navigate to Apps and Integrations
In the left sidebar of your Shopify Admin, look for the "Apps and integrations" section. This is typically located near the bottom of the navigation menu. Click on it to expand the submenu options available for your store's integrations and custom apps.
Step 3: Select "Develop Apps"
Within the Apps and integrations section, click on "Develop apps" or "App and sales channel settings." This section allows you to manage private apps and custom integrations specific to your store. If you haven't enabled private app development, you may need to toggle this feature on first.
Step 4: Create a New App
Click the "Create an app" button. A modal dialog will appear asking for your app's name. Enter a descriptive name for your application or integration. This name helps you identify the app's purpose when managing multiple tokens. For example, use names like "Inventory Sync Tool" or "Customer Data Export."
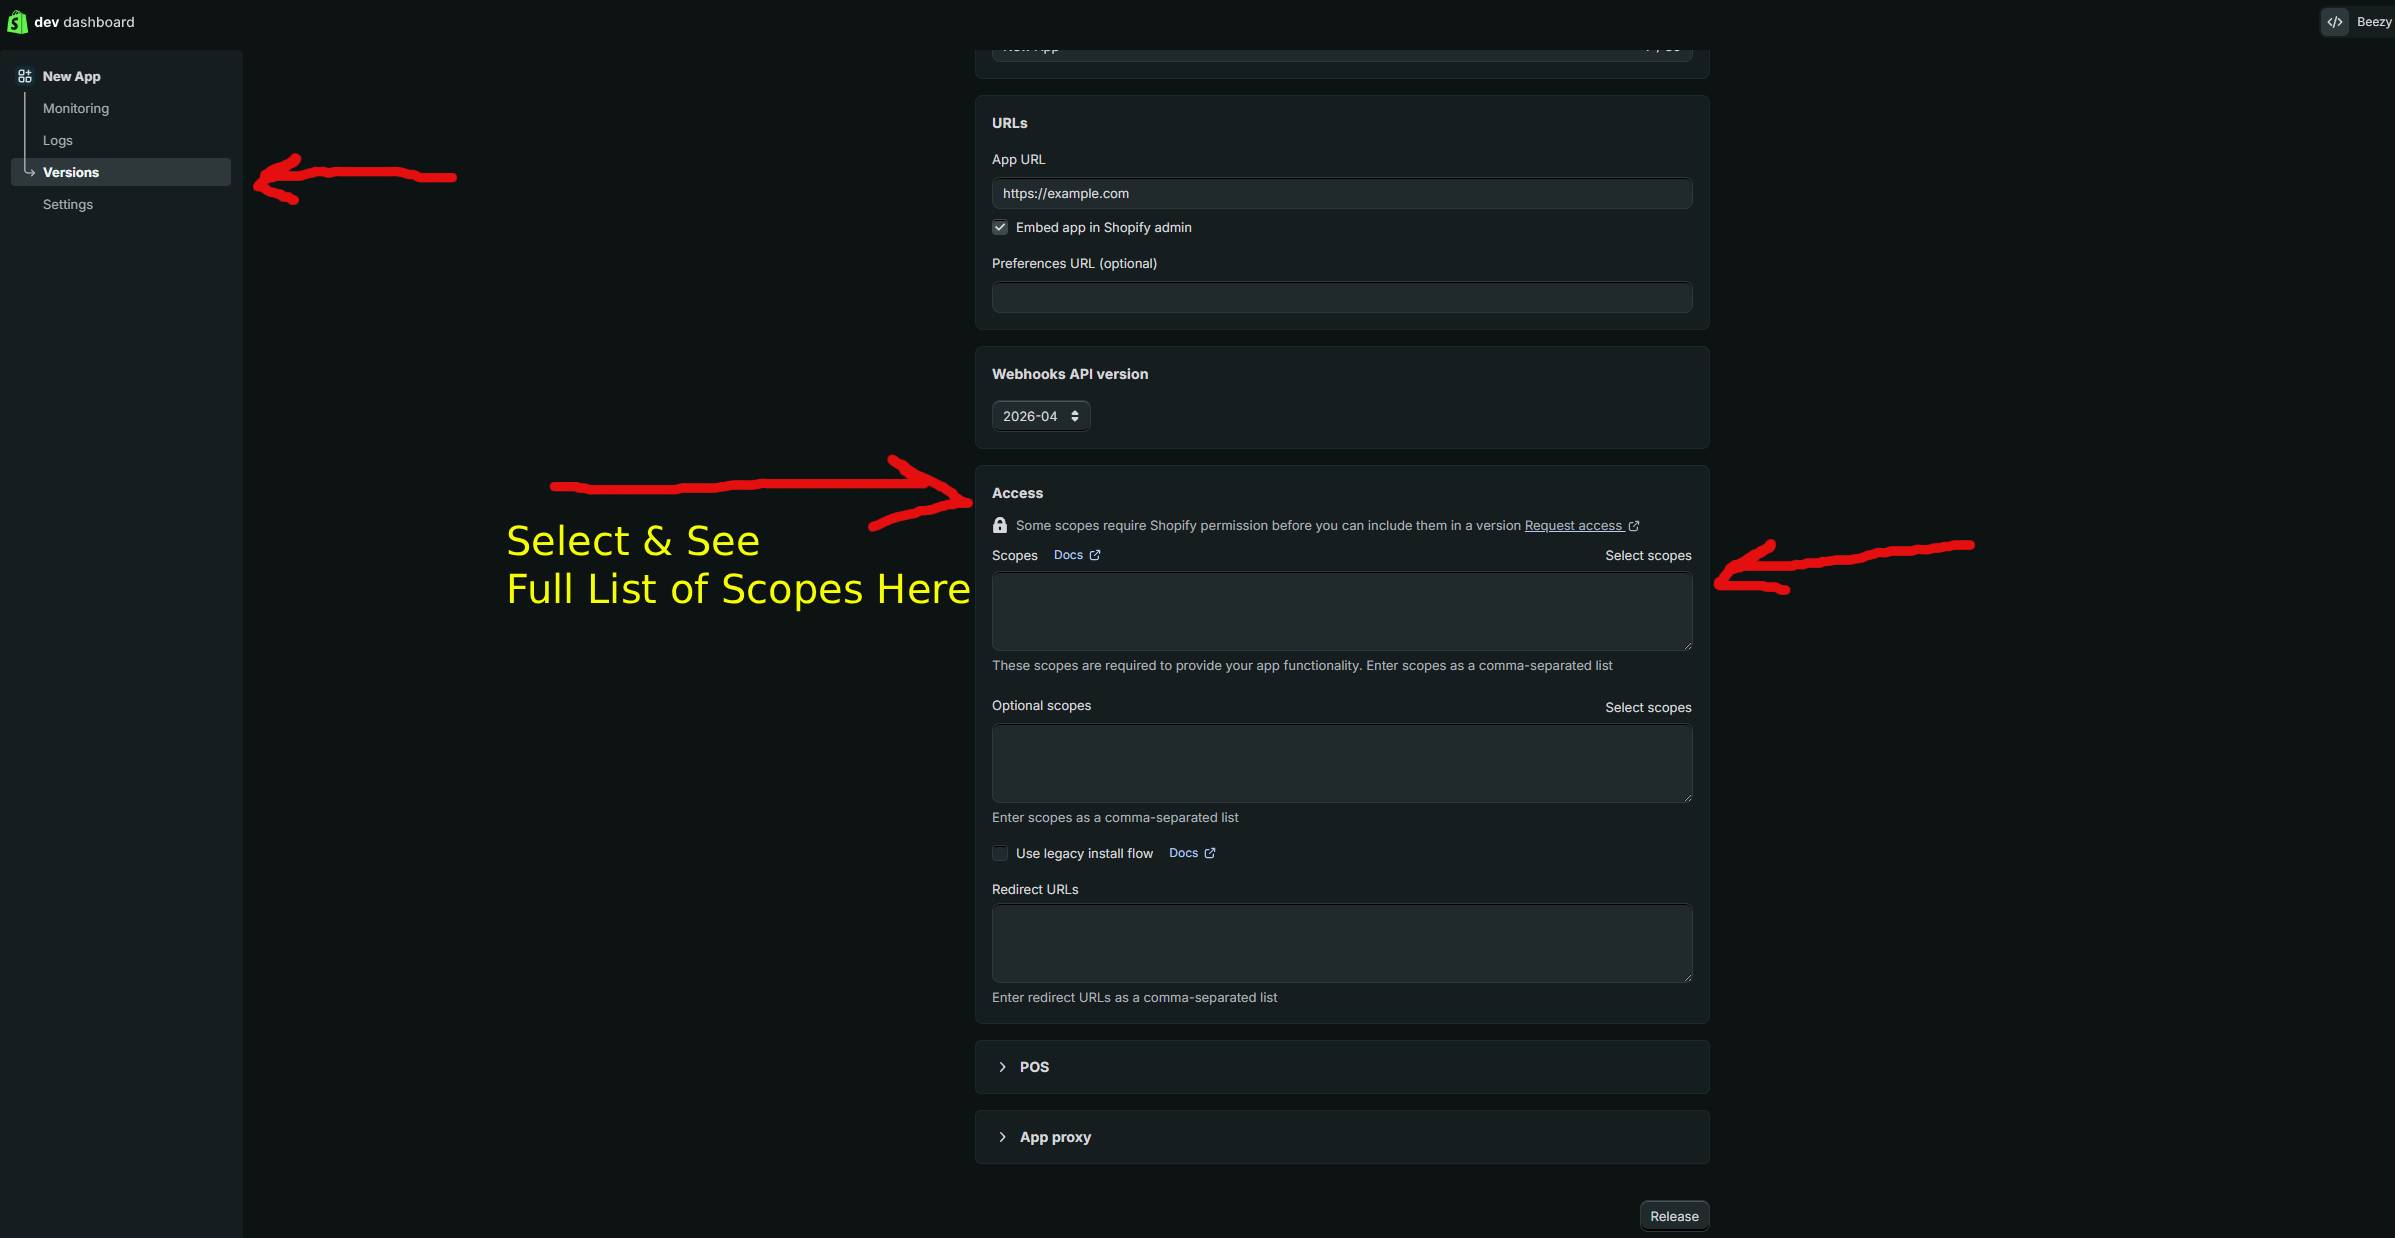
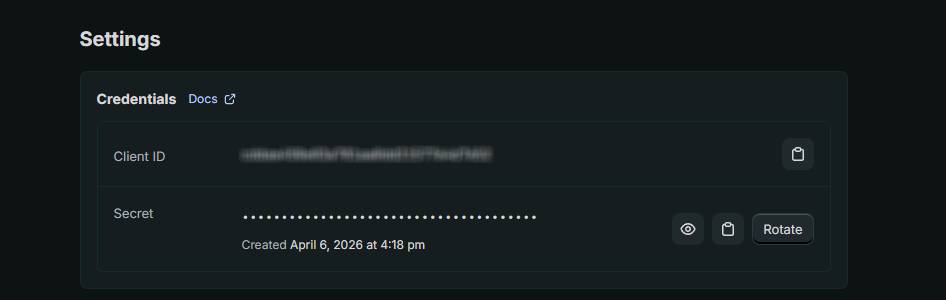
Step 5: Configure API Credentials
After creating the app, navigate to the "Configuration" tab. Here, you'll see sections for Admin API access and API credentials. Look for the "Admin API access scopes" section and select the specific scopes your application requires. Only select the minimum scopes necessary for your integration to function properly.
Step 6: Generate Your Access Token
After configuring your scopes, save your changes. Shopify will then display your access credentials. Click "Install app" to finalize the process. Your access token will appear in the "Admin API access token" field. This token is a long string of characters that serves as your authentication credential for API requests.
Important Security Note: Copy your access token immediately and store it securely. Shopify will not display this token again after you leave the page. If you lose it, you'll need to regenerate a new one.
Step 7: Test Your Access Token
Once you have your access token, test it by making a simple API request to verify it's working correctly. Use the following curl command, replacing the placeholder values with your actual store URL and access token:
curl -X GET "https://YOUR-STORE.myshopify.com/admin/api/2024-01/products.json" \
  -H "X-Shopify-Access-Token: YOUR_ACCESS_TOKEN"
If successful, this request will return a JSON response containing your store's products. A 200 status code indicates your token is valid and properly configured.
Step 8: Implement Token Securely in Your Application
Store your access token in environment variables rather than hardcoding it into your source code. Create a .env file in your project root:
SHOPIFY_STORE_URL=your-store.myshopify.com
SHOPIFY_ACCESS_TOKEN=your_access_token_here
SHOPIFY_API_VERSION=2024-01
Access these variables in your application using your language's environment variable library. For Node.js, use the dotenv package. For Python, use python-dotenv. This prevents accidental token exposure through version control systems.
Using GetShopifyToken (Faster Method)
While the manual process works well, it requires navigating multiple Shopify admin screens and managing configuration details. GetShopifyToken at https://getshopifytoken.com automates this entire workflow, allowing you to generate access tokens in seconds.
Simply authenticate with your Shopify store, select your required API scopes from a user-friendly interface, and GetShopifyToken handles the rest. The service generates your token immediately and provides clear instructions for implementation. For developers working with multiple Shopify stores or frequently creating new integrations, this automated approach saves significant time and reduces configuration errors.
Common Issues
- "Private app development is disabled": Your store owner may have disabled this feature. Contact your store administrator to enable "Develop apps" in the store settings.
- "Invalid API scope": Double-check that your requested scopes are spelled correctly and are valid for your API version. Consult the official Shopify API documentation for your version.
- "401 Unauthorized error when testing:": Verify your access token is complete and hasn't been truncated. Regenerate if uncertain. Ensure you're using the correct store URL format.
- "Token disappeared after page reload": Shopify displays tokens only once. If you didn't save it, you must regenerate a new token from the app settings.
- "API requests returning 403 Forbidden:": Your token lacks the required scopes. Return to your app configuration and add the necessary scopes, then regenerate your token.
- "Rate limiting errors (429 status code)": You're making too many API requests. Implement exponential backoff and request throttling in your application.
Related Guides
- How to Refresh and Rotate Shopify Access Tokens
- Building a Custom Shopify App with Admin API
- Managing Multiple Shopify Store Tokens Securely
Frequently Asked Questions
Q: How long are Shopify access tokens valid?
Shopify access tokens remain valid indefinitely until you manually revoke or regenerate them. However, it's best practice to rotate tokens periodically (every 90 days) and immediately rotate them if you suspect compromise. Unlike some OAuth tokens, Shopify tokens don't expire automatically, giving you flexibility in managing long-running integrations.
Q: Can I have multiple access tokens for different purposes?
Yes, you can create multiple apps within your Shopify store, each with its own access token and specific scopes. This is particularly useful when different integrations require different permission levels. For example, you might have one token for inventory management (with only product scopes) and another for customer data (with only customer scopes), following the principle of least privilege.
Q: What should I do if my access token is compromised?
Immediately regenerate or delete the token from your app settings in the Shopify Admin. Go to the app configuration, find the "Admin API access token" section, and click "Regenerate" or "Revoke." Update your application with the new token right away. If the token was exposed in public repositories, consider it fully compromised and regenerate regardless of uncertainty.