How to Get a Shopify Access Token for Custom Apps and Integrations
In 2026, obtaining a Shopify access token remains one of the most critical steps for developers, agencies, and businesses looking to build custom applications, integrations, or automations with their Shopify store. Whether you're connecting a third-party tool, building a custom app, or automating workflows, understanding how to generate and manage Shopify access tokens is essential for secure API communication.
A Shopify access token is a unique authentication credential that allows your application to make API requests on behalf of a Shopify store. This guide walks you through everything you need to know about obtaining your Shopify access token in 2026, including the prerequisites, required API scopes, step-by-step instructions, and solutions to common issues.
What You Need
- A Shopify store account (any plan: Basic, Standard, Premium, or Plus)
- Admin access to your Shopify store
- Access to the Shopify Admin dashboard
- Basic understanding of API authentication and tokens
- A development environment ready to use the token (for testing purposes)
- Knowledge of which API scopes your integration requires
- A secure location to store your access token (never share publicly)
Required API Scopes
API scopes define what permissions your access token has. Before creating a token, you must determine which scopes your application needs. Here are the most common scopes required for different use cases:
| Scope | What It Allows |
|---|---|
| read_products | Retrieve product information including titles, descriptions, prices, and inventory data from your store |
| write_products | Create, update, and modify products in your store, including pricing and inventory adjustments |
| read_orders | Access order information such as customer details, order status, line items, and transaction history |
| write_orders | Create and modify orders, including order notes, fulfillment status, and customer communications |
| read_customers | Retrieve customer profiles, contact information, addresses, and purchase history |
Additional scopes available include write_customers, read_inventory, write_inventory, read_locations, read_fulfillments, write_fulfillments, and many others depending on your integration needs.
Step-by-Step Guide
Follow these detailed steps to generate your Shopify access token through the Admin dashboard:
- Log in to your Shopify Admin
Navigate to your Shopify store's admin dashboard at https://admin.shopify.com. Enter your credentials and authenticate with any two-factor authentication if enabled. Ensure you're using an account with full admin access.
- Navigate to Apps and Integrations
In the left sidebar menu, locate and click on "Apps and integrations" (previously called "Apps" in earlier Shopify versions). This section contains all your installed apps and custom app management.
- Access App and Integration Settings
Click on "App and integration settings" or look for a "Develop apps" option. In 2026, Shopify may label this differently based on your store plan and region, but the functionality remains consistent across all store types.
- Create a New App
Click the "Create an app" button. You'll be prompted to enter a name for your custom app. Use a descriptive name that identifies the purpose of the integration (e.g., "Inventory Sync Tool" or "Email Marketing Integration").
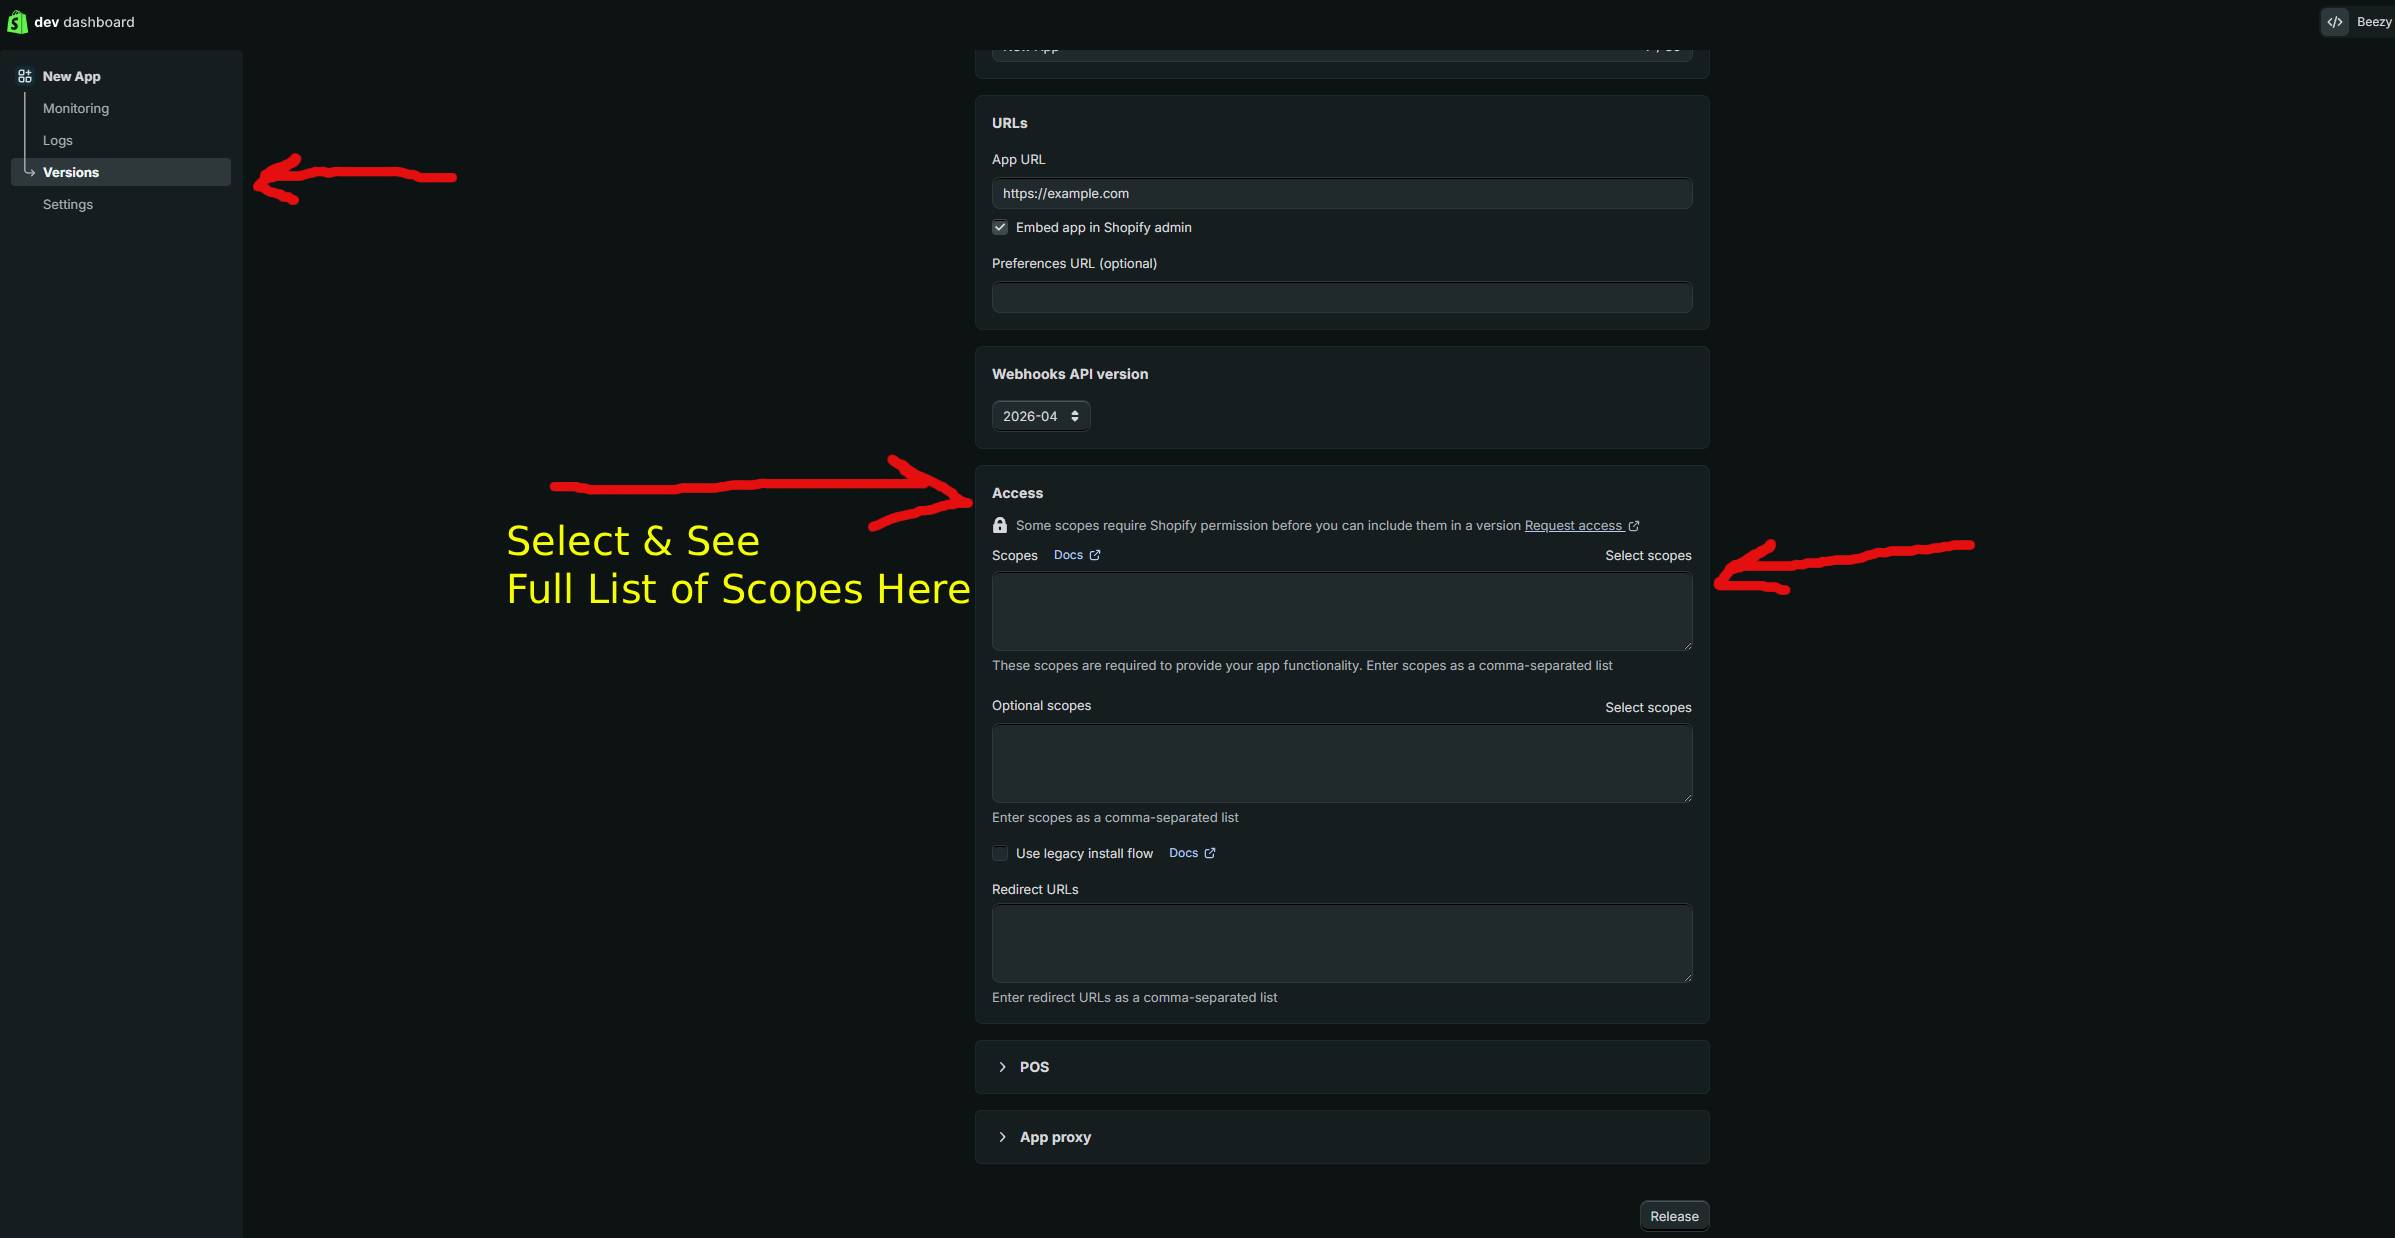
- Configure API Scopes
After creating the app, navigate to the "Configuration" or "Scopes" section. Select all the API scopes your integration requires. Be conservative with permissions—only request the scopes you actually need. For example, if you only read product data, request only read_products, not write_products.
- Save and Review Scopes
Click "Save" to confirm your scope selections. Shopify will display a summary of the permissions you're granting. Review this carefully to ensure all required scopes are included.
- Generate Access Token
Navigate to the "API credentials" or "Admin API" section of your app settings. You should see an option to "Reveal" or "Generate" your access token. Click this button to generate your unique access token. Shopify will display the token only once—copy it immediately and store it securely.
- Store Your Token Securely
Copy your access token and save it in a secure location, such as an environment variable, secure vault, or secrets management system. Never commit tokens to version control systems like GitHub. Your token should be treated like a password—never share it publicly or with unauthorized users.
- Test Your Token
Use your access token to make a test API call to verify it's working correctly. Here's an example using cURL:
curl -X GET "https://YOUR-STORE.myshopify.com/admin/api/2026-01/products.json" \
  -H "X-Shopify-Access-Token: shpat_YOUR_ACCESS_TOKEN_HERE" \
  -H "Content-Type: application/json"
Replace "YOUR-STORE" with your actual store name and "shpat_YOUR_ACCESS_TOKEN_HERE" with your generated token. If successful, you'll receive a JSON response containing your products. A 401 Unauthorized error indicates an invalid or expired token.
- Implement Token in Your Application
Store the token in your application's configuration using environment variables. For example, in a Node.js application:
const accessToken = process.env.SHOPIFY_ACCESS_TOKEN;
const storeUrl = process.env.SHOPIFY_STORE_URL;

const headers = {
  'X-Shopify-Access-Token': accessToken,
  'Content-Type': 'application/json'
};
Always retrieve the token from environment variables or secure configuration files, never hardcode it directly in your source code.
- Monitor and Rotate Tokens Regularly
In 2026, security best practices recommend rotating your access tokens every 90 days. Most development teams use automated systems to cycle tokens and update their applications without downtime. Monitor your token usage through Shopify's Admin audit logs to detect any suspicious activity.
Using GetShopifyToken (Faster Method)
While the manual process outlined above is straightforward, many developers prefer a faster, more automated approach. GetShopifyToken (available at https://getshopifytoken.com) streamlines the entire access token generation process. Instead of navigating through multiple Admin dashboard menus and manually configuring scopes, GetShopifyToken automates token creation with an intuitive interface.
The service handles scope configuration, security best practices, and token storage recommendations automatically. For developers managing multiple Shopify stores or requiring frequent token generation and rotation, this approach saves significant time and reduces configuration errors. GetShopifyToken also provides token management tools, expiration tracking, and security audit features that aren't available in the standard Shopify dashboard.
Common Issues
- 401 Unauthorized Error
This error typically means your access token is invalid, expired, or formatted incorrectly. Verify the token is copied exactly as shown in the Admin dashboard. Check that you're using the correct store URL. If the token is old (more than 90 days), generate a new one.
- Insufficient Scopes for the Operation
If you receive a scope permission error, your token lacks the necessary permissions for that API call. Return to your app configuration, add the required scope, and generate a new token. This error message will specify which scope is missing.
- Token Not Appearing in Credentials Section
Ensure you've clicked "Save" on your scope configuration. Your app must have at least one scope selected before a token can be generated. If you still don't see the option, refresh the page or try a different browser.
- Accidental Token Exposure
If you've accidentally shared your access token in a public repository or communication, revoke it immediately by deleting the app from your configuration. Generate a new token with a new app instance. Exposed tokens should be considered compromised and removed as soon as possible.
- Token Expiration After 90 Days
Shopify access tokens don't expire automatically, but security best practices recommend rotating them regularly. Set up automated token rotation in your infrastructure to prevent service disruptions.
- API Rate Limiting with Your Token
Your access token is subject to Shopify's API rate limits. Standard plans allow 2 requests per second, while Premium and Plus plans allow higher limits. If you're hitting rate limits, implement request queuing or upgrade your store plan.
Related Guides
- How to Revoke and Delete Shopify Access Tokens
- Shopify API Authentication Methods: OAuth vs Access Tokens in 2026
- Best Practices for Securing Shopify API Credentials
Frequently Asked Questions
Q: How long does a Shopify access token last?
Shopify access tokens don't have an automatic expiration date—they remain valid indefinitely until you manually revoke them by deleting the associated app. However, Shopify recommends rotating tokens every 90 days as a security best practice. Many organizations implement automated token rotation systems to maintain security without service interruptions.
Q: Can I use the same access token across multiple applications?
Yes, technically you can use the same token in multiple applications, but this is not recommended from a security perspective. If one application is compromised, all applications using that token are at risk. Instead, create separate custom apps for each integration, each with its own access token and only the necessary scopes. This follows the principle of least privilege and limits exposure in case of a breach.
Q: What's the difference between API access tokens and OAuth tokens?
API access tokens are used for custom apps and integrations you build for your own store. They're generated directly in the Shopify Admin dashboard. OAuth tokens are used for public apps distributed to other Shopify merchants through the Shopify App Store. OAuth involves a more complex authentication flow where merchants grant permissions through an authorization page. For custom integrations with your own store, use API access tokens. For building apps to sell or distribute, use OAuth.