How to Get a Shopify Access Token for API Integration
Getting a Shopify access token is essential for developers and merchants who want to integrate third-party applications with their Shopify store. Whether you're building a custom app, connecting inventory management tools, or automating order processing, you'll need a valid access token to authenticate your API requests. This comprehensive guide will walk you through every step of obtaining and managing your Shopify access token in 2026.
An access token is a unique credential that grants your application permission to access specific data and perform actions on your Shopify store. Think of it as a digital key that unlocks the APIs you need while keeping your store's sensitive information secure. Without a proper access token, your application cannot communicate with Shopify's platform.
What You Need
- A Shopify store (either development or production store)
- Admin access to your Shopify store dashboard
- Basic understanding of API concepts and authentication
- A code editor or IDE for managing credentials securely
- Access to your store's settings and app configuration pages
- Environment variable management tools (recommended for security)
- A terminal or command-line interface for testing API calls
- Knowledge of the specific API scopes your integration requires
Required API Scopes
API scopes define what permissions your access token has. You must request only the scopes your application needs. Here are the most commonly used scopes in 2026:
| Scope | What It Allows |
|---|---|
| read_products | Read access to product data, collections, and inventory information without making modifications |
| write_products | Full access to create, update, and delete products, variants, and related product data |
| read_orders | Access to view order information, fulfillment status, and customer order history |
| write_orders | Permission to create orders, modify existing orders, and manage order fulfillment |
| read_customers | Access to customer data including contact information, addresses, and order history |
Step-by-Step Guide
Follow these detailed steps to obtain your Shopify access token manually through the admin dashboard.
Step 1: Log Into Your Shopify Admin Dashboard
Navigate to your Shopify store's admin panel by visiting https://admin.shopify.com or clicking "Admin" in your store's main page. Log in with your credentials. Make sure you have admin-level permissions—store owners and staff members with full administrative access can create access tokens.
Step 2: Access the Apps and Integrations Settings
From your admin dashboard, click on "Settings" in the bottom left corner. In the Settings menu, look for "Apps and integrations" or "Develop apps" depending on your store's configuration. This is where you'll manage all your custom applications and their credentials.
Step 3: Create a New App or Select an Existing One
Click the "Create an app" button to start building a new integration. You'll be prompted to name your application—use a descriptive name that clearly identifies what the app does, such as "Inventory Sync Tool" or "Order Auto-Responder." This makes it easier to manage multiple tokens if you have several integrations running.
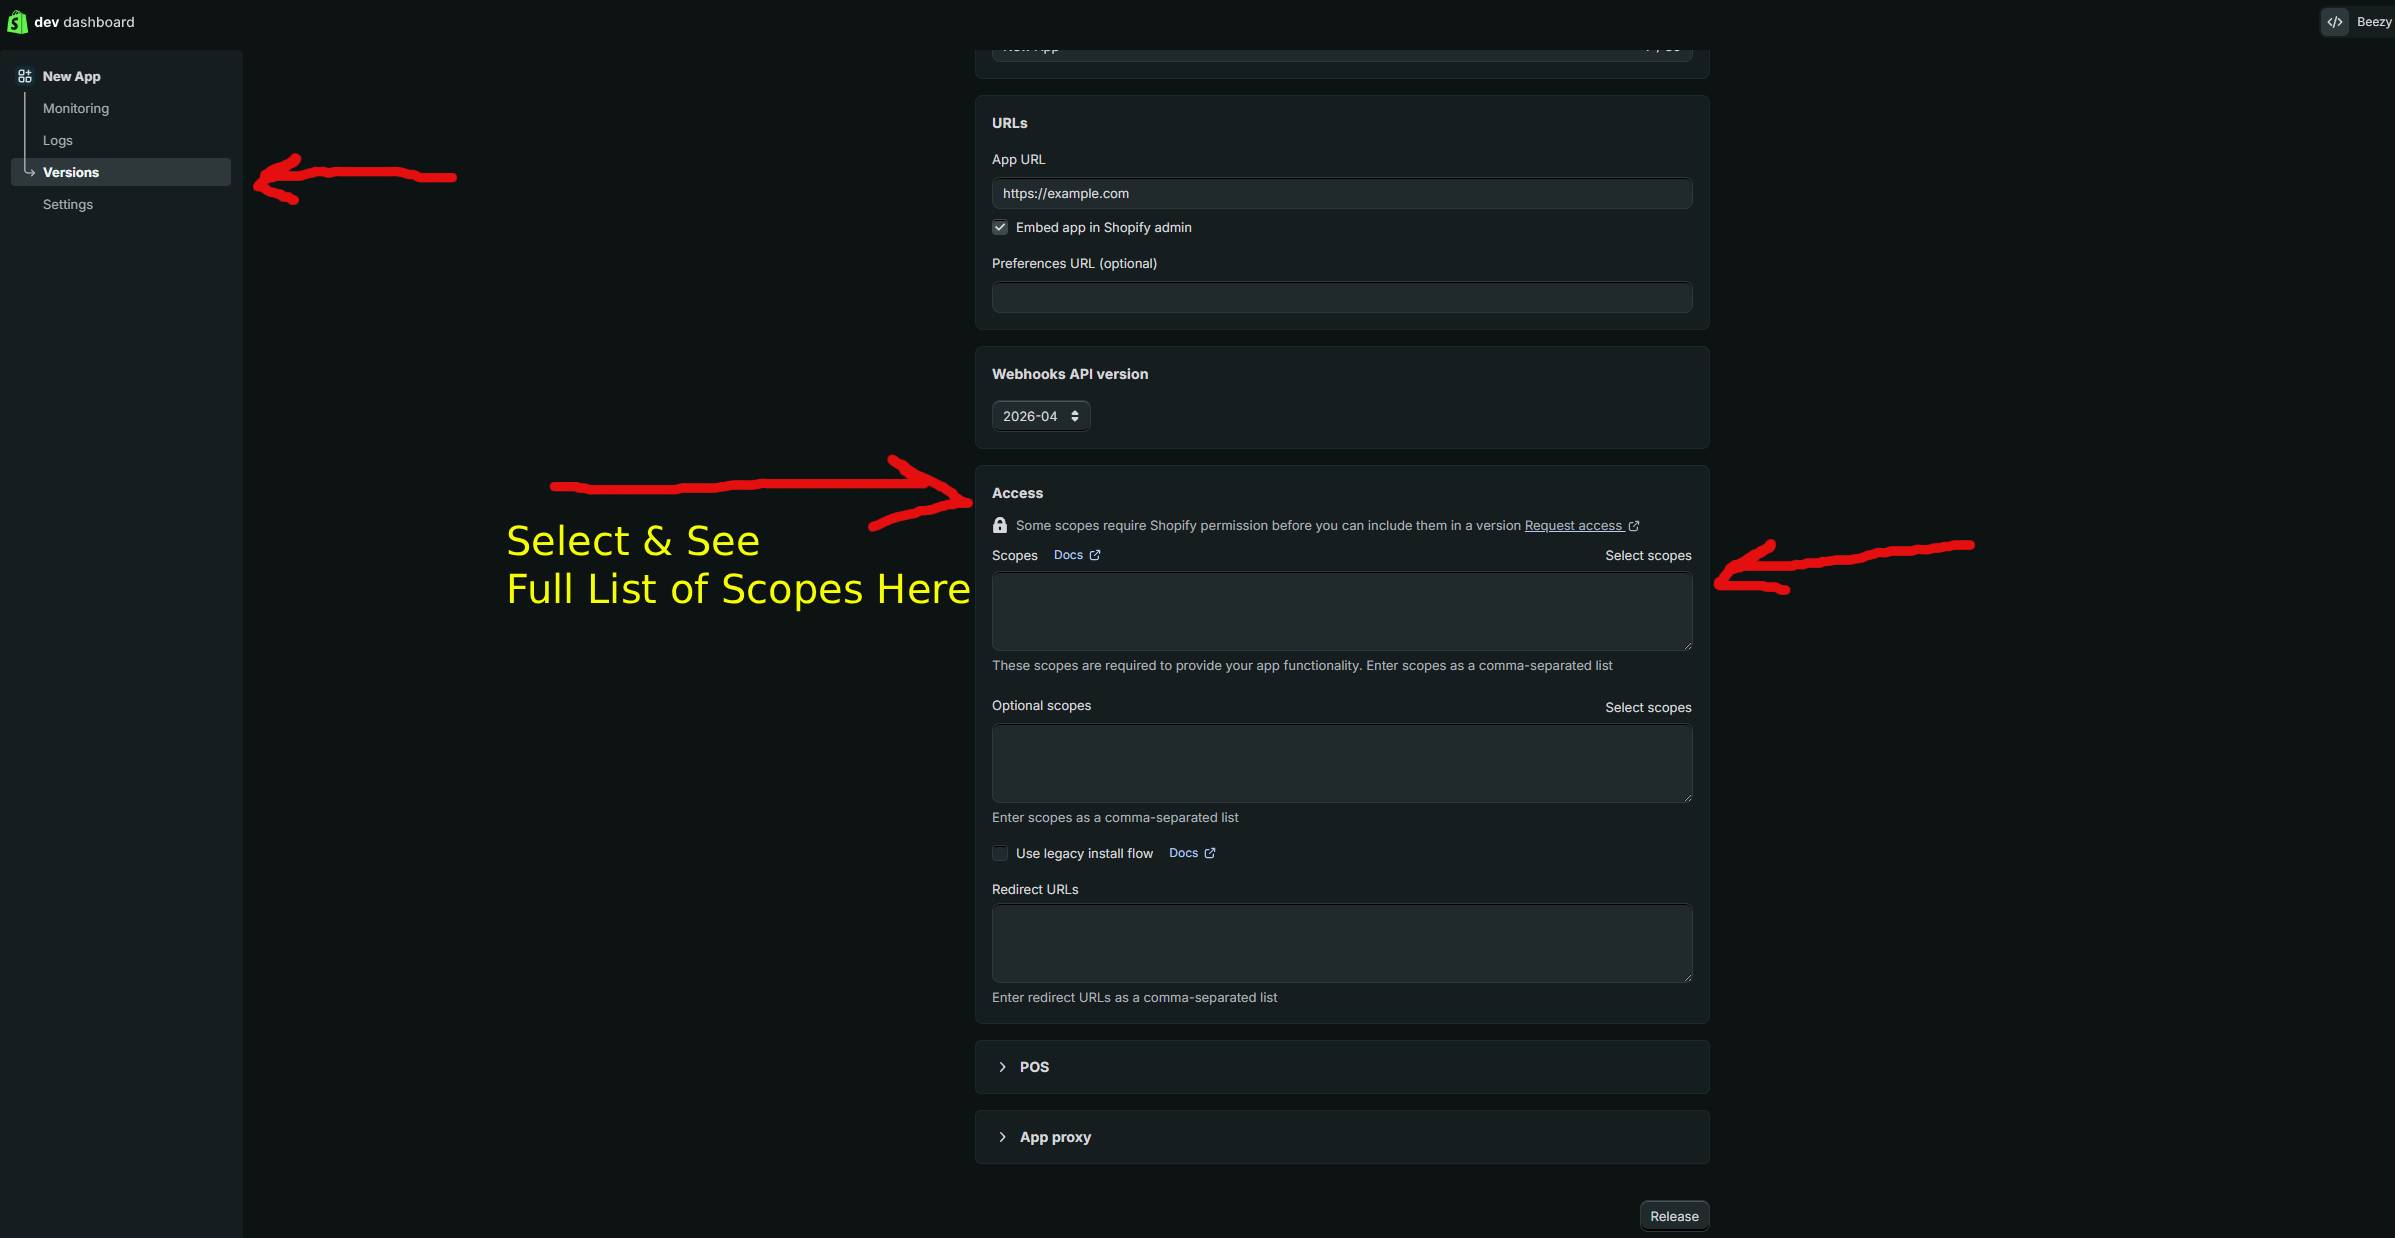
Step 4: Configure Your App's Permissions
After creating your app, navigate to the "Configuration" tab. Here you'll define the API scopes your application needs. Review the list of available scopes carefully and select only those required for your specific use case. Requesting unnecessary scopes poses a security risk and violates the principle of least privilege. For example, if your app only reads product data, request read_products but not write_products.
Step 5: Generate Your Access Token
Once you've configured your permissions, scroll down to the "Admin API access tokens" section. Click "Generate access token" or a similar button depending on your Shopify version. Shopify will generate a unique token that grants the permissions you specified. This token will only be displayed once—copy it immediately and store it securely.
Step 6: Verify Your Token Works
Test your newly created access token with a simple API request. Open your terminal or command-line interface and run the following curl command, replacing YOUR_ACCESS_TOKEN with your actual token and your-store.myshopify.com with your store's domain:
curl -X GET "https://your-store.myshopify.com/admin/api/2026-01/graphql.json" \
  -H "X-Shopify-Access-Token: YOUR_ACCESS_TOKEN" \
  -H "Content-Type: application/json" \
  -d '{"query":"{ shop { name id } }"}'
If successful, you'll receive a JSON response with your shop's information. An authentication error indicates an invalid token or incorrect store domain.
Step 7: Securely Store Your Token
Never hardcode your access token directly into your application source code. Instead, use environment variables. Create a .env file in your project root (make sure to add it to .gitignore) and store your token there:
SHOPIFY_ACCESS_TOKEN=shpat_1234567890abcdefghijklmnop
SHOPIFY_STORE_NAME=your-store
SHOPIFY_API_VERSION=2026-01
In your application code, load these variables using your language's environment variable library. In Node.js, use the dotenv package. In Python, use python-dotenv or os.environ.
Using GetShopifyToken (Faster Method)
If manually creating apps and generating tokens seems complex, getshopifytoken.com offers an automated solution that streamlines the entire process. This platform handles the OAuth flow automatically and provides you with a valid access token in minutes rather than navigating multiple Shopify admin pages. Simply visit https://getshopifytoken.com, authorize your store, select your required scopes, and your token will be generated and displayed immediately. This method is especially useful for developers building integrations for multiple stores or those who value convenience and speed.
Common Issues
- Invalid Token Error: Ensure you've copied the token correctly without extra spaces or characters. Tokens are case-sensitive and contain special characters that must be preserved exactly.
- Insufficient Permissions: If you receive a "unauthorized" error, verify that your token includes all required scopes for your API request. You may need to regenerate the token with additional permissions.
- Token Expired: Shopify access tokens don't expire automatically, but if you've regenerated them in your app settings, old tokens become invalid immediately. Update your environment variables with the new token.
- Store Not Found: Double-check your store domain format. It should be
your-store.myshopify.comor your custom domain if you've configured one. Typos are a common cause of connection failures. - Rate Limiting: Shopify enforces API rate limits. If you exceed them, requests will fail with a 429 error. Implement exponential backoff retry logic in your application.
- Scope Not Available: Some scopes are only available for specific app types or Shopify plans. Verify that your store plan supports the scopes you're requesting.
- CORS Issues: Access tokens can't be used directly from browser-based JavaScript due to CORS restrictions. Always use a backend server to make authenticated API calls.
Related Guides
- How to Revoke and Regenerate Shopify Access Tokens
- Understanding Shopify API Scopes and Permissions in 2026
- Building a Custom Shopify App: Complete Developer Guide
- Shopify GraphQL API vs REST API: Which Should You Use
Frequently Asked Questions
Q: Can I use the same access token across multiple applications?
While technically possible, it's not recommended from a security perspective. Each application should have its own dedicated token with only the specific scopes it requires. If one application is compromised, a hacker would only gain access to that app's limited permissions rather than all your integrations. Creating separate tokens for each app follows the principle of least privilege and makes it easier to revoke access if needed.
Q: How often do Shopify access tokens expire?
Shopify access tokens do not automatically expire based on time. They remain valid indefinitely unless you explicitly revoke them or regenerate new tokens in your app settings. However, it's good practice to periodically rotate your tokens as a security measure, similar to changing passwords. Some organizations implement automatic token rotation every 90 days for compliance purposes.
Q: What's the difference between a custom app token and a public app token?
Custom app tokens are generated for apps that only you use on your store and are managed through the admin dashboard. Public app tokens are used when you're building an app for the Shopify App Store that multiple merchants will install. Public apps use OAuth 2.0 flow where each merchant grants permission individually, whereas custom apps use a single static token. For most integrations, custom app tokens are simpler and more appropriate.