How to Get a Shopify Access Token for Customer Data Management
In 2026, managing customer data through Shopify's API has become essential for businesses looking to integrate third-party applications, build custom solutions, and automate workflows. Whether you're a developer building an app, a merchant connecting external tools, or a service provider managing multiple stores, understanding how to obtain and use a Shopify access token is crucial. This comprehensive guide will walk you through the entire process of getting a customer access token in Shopify, covering everything from prerequisites to troubleshooting common issues.
A Shopify access token is a secure credential that allows applications to authenticate and interact with your Shopify store's data through the Shopify API. Unlike basic authentication methods, access tokens provide granular control over what data can be accessed and modified, making them the preferred method for secure API integration in modern e-commerce environments.
What You Need
- An active Shopify store (development or live store)
- Admin access to your Shopify store or the ability to create custom apps
- Understanding of API basics and REST or GraphQL (depending on your needs)
- A secure environment to store your access token (never share it publicly)
- Your Shopify store URL (e.g., yourstore.myshopify.com)
- Basic knowledge of your intended use case (customer data retrieval, order management, etc.)
- A code editor or development environment (optional, but recommended)
- cURL, Postman, or another API testing tool (for testing)
Required API Scopes
API scopes define what permissions your access token has. Selecting the correct scopes is critical for both functionality and security. Here are the most common scopes you'll need for customer data management:
| Scope | What It Allows |
|---|---|
read_customers |
Read customer information including names, emails, phone numbers, and addresses. Essential for customer segmentation and CRM integrations. |
write_customers |
Create, update, and modify customer records. Use this when you need to sync customer data from external sources or update customer profiles programmatically. |
read_orders |
Access order history, line items, and transaction data. Required for analytics, order fulfillment integrations, and customer insights. |
read_customer_payment_methods |
Retrieve stored payment methods for customers who have enabled this feature. Important for subscription services and repeat purchase applications. |
read_marketing_events |
Access customer engagement data including email marketing subscriptions and consent preferences. Critical for compliance and marketing automation. |
Step-by-Step Guide
Step 1: Access Your Shopify Admin Dashboard
Log in to your Shopify store's admin panel using your credentials. Navigate to the URL yourstore.myshopify.com/admin and enter your email and password. If you have two-factor authentication enabled, complete that verification step as well.
Step 2: Navigate to the App and Integrations Section
In your Shopify admin dashboard, locate the "Apps and integrations" section in the left sidebar. Click on it to expand the menu. You should see options for "Apps and sales channels," "Develop apps," and "Installed apps." Click on "Develop apps" to access the application development interface.
Step 3: Create a New App
On the "Develop apps" page, you'll see any existing apps you've created. Click the "Create an app" button to start creating a new application. You may need to confirm that you want to create a development app; click "Create app" to proceed.
Step 4: Configure Your App Settings
Give your app a name (e.g., "Customer Data Integration" or "Order Management Tool"). This name is for your reference and helps you identify the app's purpose in your list of applications. After naming the app, click "Create app" to initialize it.
Step 5: Set API Credentials and Scopes
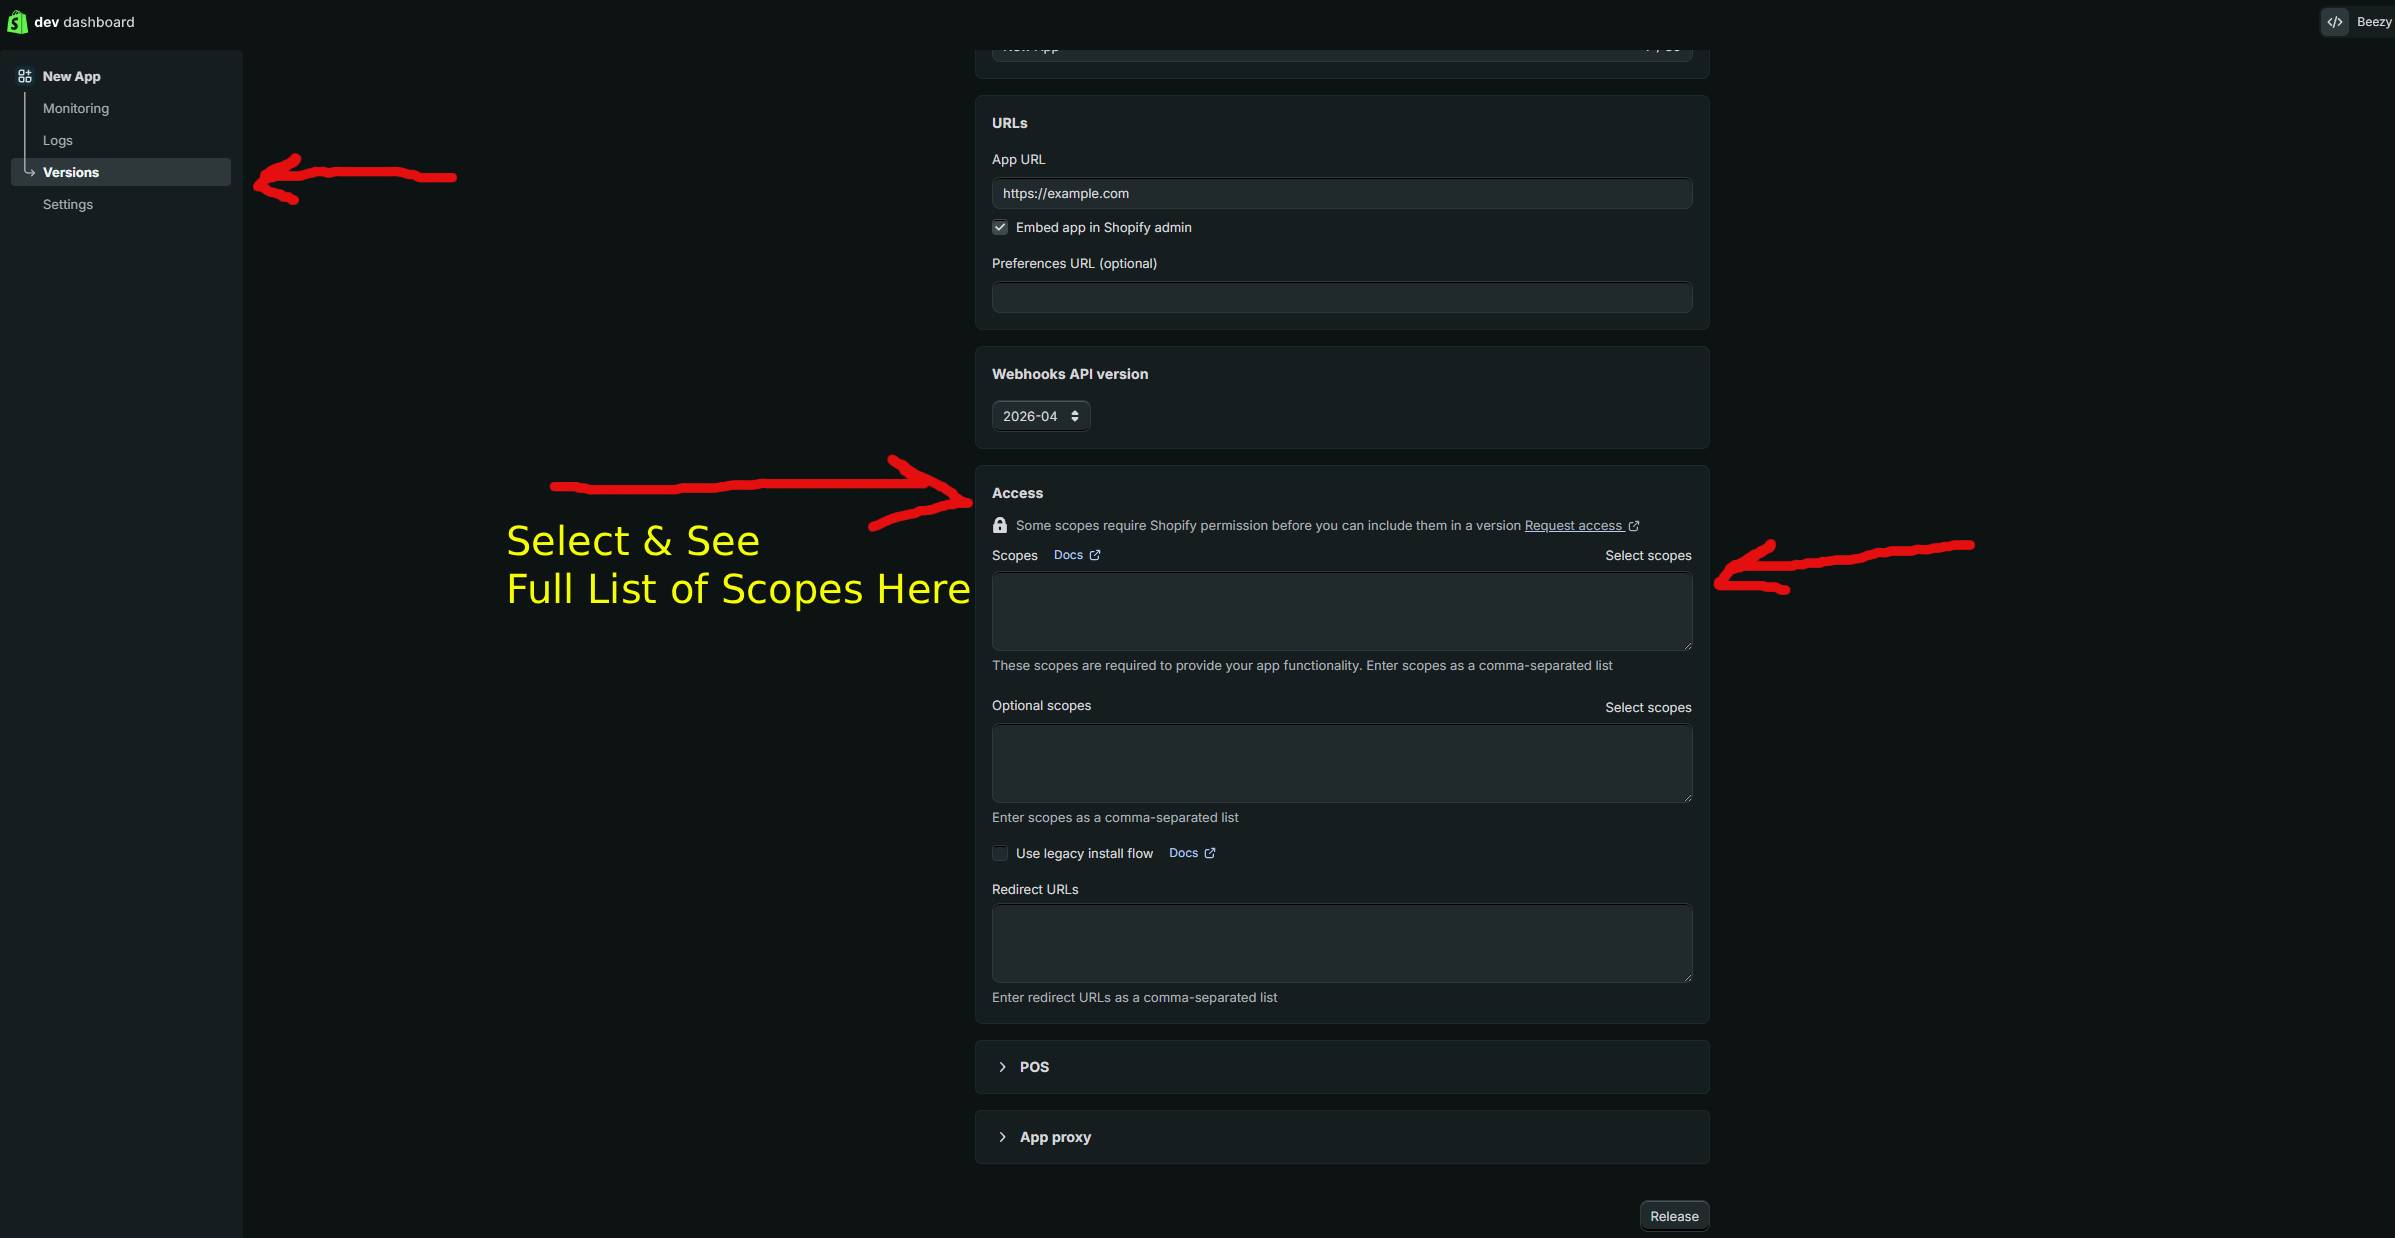
Once your app is created, you'll be taken to the app configuration page. Look for the "Configuration" section in the left sidebar. Under this section, you'll find options to set your admin API access scopes. Click on "Admin API access scopes" to view and select the permissions your application needs.
Select the appropriate scopes based on your use case. For customer data management, you'll typically need read_customers, write_customers, and possibly read_orders. Always follow the principle of least privilege—only request the scopes you actually need. After selecting your scopes, save your changes.
Step 6: Generate Your Access Token
In the app's "API credentials" section (usually found under the Configuration tab), you'll see an "Admin API access token" field. Click the "Reveal token" button to display your access token. This is a long string of characters that authenticates your API requests.
Important Security Note: Your access token is sensitive information equivalent to a password. Never share it publicly, commit it to version control, or expose it in client-side code. Always store it securely in environment variables or a secure secrets management system.
Step 7: Copy and Store Your Token Securely
Click the copy button next to your token or manually select and copy it. Store this token in a secure location. If you're using it in code, create an environment variable (typically in a .env file or your hosting platform's environment variable settings).
Step 8: Test Your Access Token
Before deploying your integration, test that your access token works correctly. Use the following cURL example to verify your token has the correct permissions and can access customer data:
curl -X GET "https://yourstore.myshopify.com/admin/api/2024-01/customers.json" \
  -H "X-Shopify-Access-Token: YOUR_ACCESS_TOKEN_HERE"
Replace yourstore.myshopify.com with your actual store URL and YOUR_ACCESS_TOKEN_HERE with the access token you just created. If successful, you'll receive a JSON response containing your customer data. If you receive a 401 Unauthorized error, double-check that your token is correct and has the appropriate scopes.
Step 9: Implement Token Rotation and Refresh Policies
For enhanced security, especially in production environments, establish a policy for regularly rotating your access tokens. Shopify doesn't issue automatic token expiration, but you can manually revoke old tokens and generate new ones periodically. This limits the window of exposure if a token is compromised.
Using GetShopifyToken (Faster Method)
If you want to streamline this process and avoid manual configuration steps, GetShopifyToken at https://getshopifytoken.com provides an automated solution. This service handles the technical complexity of creating and managing Shopify access tokens, allowing you to generate tokens in minutes rather than navigating multiple admin screens.
GetShopifyToken guides you through scope selection with a user-friendly interface, securely generates your token, and provides best practices for token storage and usage. For developers and merchants working with multiple stores or frequently creating new integrations, this approach significantly reduces setup time and the potential for configuration errors.
Common Issues
- 401 Unauthorized Error: This error indicates your access token is invalid, expired, or doesn't have the required scopes. Verify the token is correct, hasn't been revoked, and has the appropriate API scopes enabled.
- 403 Forbidden Error: Your token is valid but doesn't have permission to access the requested resource. Check that your app has the necessary scopes (e.g.,
read_customers) enabled in your app configuration. - Token Accidentally Exposed: If you've shared your token publicly or committed it to a repository, immediately go to your app settings and click "Revoke" to invalidate the token. Generate a new one and update all your systems.
- Rate Limiting: Shopify implements rate limiting on API calls. If you exceed 40 requests per second on REST or 100 requests per second on GraphQL, your requests will be throttled. Implement retry logic with exponential backoff in your application.
- Missing Environment Variables: If your application can't find your token, ensure you've properly defined it as an environment variable and that your code is correctly referencing it (e.g.,
process.env.SHOPIFY_ACCESS_TOKENin Node.js). - CORS Issues: Access tokens should never be used in client-side JavaScript. Always make API requests from your server to avoid CORS errors and security vulnerabilities. Use a backend service to handle authentication.
- API Version Incompatibility: Shopify releases new API versions regularly. If your endpoint includes an old API version (e.g.,
/admin/api/2023-01/), you may encounter deprecated field errors. Update to the latest stable API version.
Related Guides
- How to Use Shopify GraphQL API for Customer Queries: Learn advanced query techniques for retrieving complex customer data using GraphQL instead of REST.
- Setting Up Shopify Webhook Authentication: Discover how to securely receive real-time customer updates from Shopify to your external systems.
- Best Practices for Storing API Tokens in Production: Explore industry-standard approaches to secrets management and secure credential storage.
Frequently Asked Questions
Q: Do Shopify access tokens expire?
No, Shopify access tokens do not expire automatically. However, they can be revoked manually by you or an admin, and they become invalid if the app is uninstalled. For security best practices, it's recommended to rotate tokens periodically (e.g., every 90 days) to limit the exposure window if a token is compromised. You should also revoke tokens immediately if you suspect they've been exposed.
Q: Can I use the same access token for multiple Shopify stores?
No, each access token is specific to a single Shopify store. If you need to manage multiple stores, you must create a separate app and generate a separate access token for each store. This design ensures proper data isolation and security across different store accounts.
Q: What's the difference between API tokens and webhooks in Shopify?
API tokens authenticate your application to make requests to Shopify's API (pull-based approach). Webhooks, by contrast, allow Shopify to push notifications to your application when events occur (push-based approach). You often need both: API tokens to query data when needed, and webhooks to receive real-time updates about customer and order changes.
Q: Should I ever share my access token with third-party services?
You should carefully evaluate the necessity before sharing. If a third-party service requires your token, ensure they have a strong security track record, use HTTPS exclusively, and follow data protection regulations. Consider using Shopify's OAuth flow instead, which provides more controlled access and allows customers to authorize apps directly.
Q: How do I know which API version to use?
Shopify releases new API versions quarterly. It's recommended to use the latest stable version (currently 2024-01 as of early 2026). Check Shopify's API changelog for deprecations and new features. You can test with newer versions before migrating production code to ensure compatibility with your integration.
Get Your Shopify Access Token in 60 Seconds
Skip the manual OAuth flow. GetShopifyToken automates the entire process — just paste your credentials and get your token instantly.
Generate Token Now →